Image Map

Facebook Pinterest Twitter Instagram Email Family Home Crafty Recipes Goals Blog Roll PR

Saturday, April 23, 2011

Blankies for Babies

A few days ago, I put it out there that for $10, I'd make a ribbon lovey blanket and all proceeds would to go my March of Dimes team. The response has been fantastic!! I've got 25 orders for lovey blankets and they're still coming! And most of the donations are for more than $10! It always boosts my spirit to see so many people willing to donate to a good cause. <3

With all of these orders, its time to make some lovey blankets! If you're interested in getting a lovey blanket, please let me know. Lovey or not, donations can either be made via PayPal (and I'll transfer everything to MOD) or directly to my March of Dimes fund (link is on the right of the page).

Wednesday, April 20, 2011

Ribbon Lovey

For some unknown reason, babies are obsessed with soft fabric and ribbon. Who knew, right? Good thing making one of those ribbon lovey blankets is super easy! No one likes paying big bucks for something that can be homemade and customized. If you can sew a straight line, you can make one. Start collecting ribbon now - making these gets addicting.

For this project, you'll need two kinds of coordinating fabric, various types/colors of ribbon, scissors, straight pins, a sewing machine, iron, and velcro (optional). You can choose ribbon that coordinates or go with a more eclectic look.

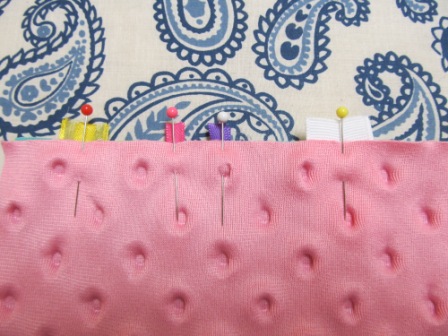
On a side note, ignore my hideous ironing board cover. Kthanx.

To start, you'll need to cut your fabric to the size you want your blanket to be. For a 10" square blanket, I cut the fabric to 10 1/2" x 10 1/2" (leaving a 1/4" seam allowance). Because I'm admittedly lazy, I use my rotary cutter and quilt squares to cut everything these days, but you can use a yard stick and scissors or even trace a book, box, etc. to get the shape you want.

Next, cut pieces of ribbon to between 3" and 4". You want them to be long enough to anchor well into the seam, yet still stick out far enough for baby to play with/nom on them. In addition to the colors of ribbon, its important to keep their texture interesting by varying the kind of ribbon - width, material, shape. Cut as many as you want of each color.

With the right sides of the fabric facing, insert folded pieces of ribbon so the edges stick out and the loop is sandwiched in between. Here's where you can get creative using whatever combination of ribbons in whatever pattern you'd like around the edges of the blanket. Leave approximately 1/4" of the ribbon ends sticking out of the fabric sandwich. This will assure there is enough to anchor it in the seam when you top stitch it later. When you get to the last side, leave 3" - 4" ribbon-free so you can turn the blanket later on after sewing.

On to sewing! Sew a 1/4" seam around the edges of the fabric, taking out straight pins as you go. Yes, you can sew over straight pins, but if your needle hits one, you don't want to know what happens. I'll give you a hint...it costs about $80 to fix. Anyway, sew around 3 3/4-ish of the sides, leaving a few inches at the end open for turning. Be sure to reinforce the stitches on either side of this opening so you don't rip the seam while turning!

Next, snip the corners with sharp scissors, making sure not to cut through any stitches. This will allow for nice sharp corners when you turn the blanket. Without snipping, the corners become bulky and rounded. Just a little detail. Turn the blanket, taking care not to put too much strain on the seam near the opening. Using something pointy (I use a knitting needle), poke out the corners that you worked so hard on! Once the blanket is turned, iron it, gently tugging on the ribbon loops to pull the seam flat.

Now you've got a blanket with a hole in it. Woo! Your options for closing up this hole are to do a blind stitch or to be lazy, like me, and just sew it up while doing the top stitch. To do this, fold in the fabric flaps in and lay it flat to match the rest of the edge. Iron flat.

Back to the sewing machine! Sew a top stitch close to the edge of the blanket - close enough to sew up the opening and anchor all of the ribbon loops. Since it needs to be there anyway, I usually use a contrasting thread or decorative stitch so it pops. Aaaand you're done!

Optional Pacifier Strap

If you want to include a pacifier strap, you'll need a 6 1/2" long piece of 1" wide ribbon and 1" wide velcro. While you are inserting ribbon loops into the fabric sandwich, insert the longer piece of ribbon somewhere along the way. As with the rest of the ribbons, leave approximately 1/4" sticking out of the seam with the rest of the ribbon to the inside. After sewing, turning, and top stitching, you can work on the strap.


Fire time! Using a lighter, CAREFULLY finish of the edge of the ribbon by holding the flame close to the edge. Please note, this only works for synthetic ribbon. Natural fibers won't melt and finish off, they'll just burn. Then, cut pieces of velcro into little squares. Put one at the end of the ribbon and sew around the edges. Tie off the excess thread and cut it close to the knot. Do the same with the opposing piece of velcro about one inch down the ribbon. Sew the same way.

Now baby has a ribbon lovey AND a pacifier. Does life get any better?


If you have any questions about this tutorial or would like me to make one of these for you, please let me know!

Sunday, April 17, 2011

I Think We Need a Bigger House...

For those of you who don't know, babies have A LOT of stuff. For those of you who know this, why the heck didn't you tell me that babies had so much stuff?! I decided to let you all in on a little secret. My little apartment is overrun by baby things. This...is my living room at the current moment.


What are you looking at here? A stroller/car seat, jogging stroller, diaper bag, bouncer seat, exersaucer, baby carrier, burp cloths, baby socks, activity mat, bucket of toys, stuffed animals, swing, Boppy pillow, and my pump. Oh, and my computer - probably logged onto the Bump. Yes, I consider the Bump a baby item. ;-) If you're wondering, this is "clean" for us right now; the carpet is vacuumed, everything is dusted, and there is no poop/spit up on anything. And yes, we use this stuff every single day.

Do we "need" all of these things? A 5 month old has about a 30 second attention span and when they're crying, you need options. Want to swing? No. Want to go for a walk? No. Want to lay on the mat? No. Its like solving a mystery! Truth be told, I'm not sure if I mind. Our lives are full of Charlie, so why wouldn't our house be full of his stuff? And those who judge should be wary...this could be your living room one day. Dun dun duuuuun!

I just keep telling myself that some day soon, we'll have a house big enough for all of this stuff.

I know...isn't that funny?

Saturday, April 16, 2011

Spring Cleaning Saturday

Its that time of the year; time to go through your closets and say, "Why the heck do we have _____?" and "Huh, so that's where _____ went!" Time to break out the piles for Good Will, yard sale, and the trash. I love this time of year. Because of my crazy work schedule, the weekends are pretty much the only time that I can really get knee deep in clutter busting though, so why not make a blogtastic day out of it! Each Saturday (and probably Sunday) I'll post about our spring cleaning efforts and how we keep three people organized in an 800 sq. foot apartment.

Today's tasks - laundry, sorting my fabric stash, getting rid of old magazines, and continuing to collect things for the yard sale on May 7th.

Despite my love of clutter busting, I can be sort of a pack rat. Hence the ridiculous stack of magazines weighting down our coffee table. This picture is of HALF of the magazines we've somehow acquired. We used to have a subscription with Mag Hound, which was a really awesome program, but with nowhere to really recycle them on campus, it was too much to store. Maybe we'll rekindle our love with Mag Hound someday in the future.

I set out this morning to go through all of my magazines and rip out the stuff I wanted. Cool article about positive discipline tactics for toddlers? *rip* Recipe for country mac and cheese? *rip* Tutorial on how to make a men's dress shirt into a dress? *rip*

Then, I took an old accordion folder that I had laying around and filed away all of the articles, recipes, and how-tos that I wanted to keep. Now, my stack of magazines can be recycled (somewhere) and all I have to store is the file folder.

Aaahhh, I feel less cluttered already.

My fabric stash is another mess to go through. I have two plastic storage cabinets (the kind of with drawers) that I'm going to use to sort the fabric by color. The worst thing ever is to go out and get fabric for a project because you didn't know you already had some. Once that's done, I should have a better inventory of what I have...and all of the projects that I have lined up. You know what they say, you're not a sewer/quilter/crafter/scrapbooker until you have multiple projects in various states of completion!

Spring cleaning onward!!

Friday, April 15, 2011

Charlie's New Tricks

One of the funny things about babies is that one day, they are unable to do something and the next, they've completely mastered it. There is no maybe, almost, or getting there. BAM they've got it and there is no going back. Case in point - rolling over.

Earlier this week, I spent a few days away from home for work, leaving Charlie and Jeff home to entertain themselves. Aside from the long nights of cranky baby teething time, they seemed to have fun! When I got back, Jeff told me that Charlie had suddenly learned how to roll from his back to his belly. Before that were only futile attempts to get on his side. Well, not only had he learned to roll to his front, but he'd discovered the joy of sleeping that way - face in buried in the mattress and everything. How much did he enjoy sleeping like this? 8 hours worth - a personal record.

Thus begins the eternal parental struggle - happy baby or doing the "right/safe thing." I'll give you a hint - 99% of the time, happy baby wins because well, happy baby = sane parents. Being able to roll over independently is a huge milestone and usually means a baby can sleep however they want. It is assumed that if they got stuck or something covered their face, they could free themselves. Yeah, tell that to my neurotic paranoia. I think I checked on him about a million times. Of course, he was fine and comfy. Lets just hope this is the beginning of a beautiful relationship...with sleep.

Now, comes a new challenge. Whenever we lay him on the floor to play, he's rolling all over the place. Our living room already looks like a Toys R Us advertisement - I can only imagine what its going to look like now that he's starting to become...*gasp!*...mobile.

Thursday, April 7, 2011

DIY Wall Art

You know how baby bedding and decor is ridiculously adorable, but ridiculously expensive? And most of the time, there isn't even decor for the set - just bedding and maybe curtains. Well, here's an inexpensive way to create custom wall art for your nursery (or any room, really). If you can trace, cut, and use a glue stick, you can do this!


First, take a picture (or find one on the internet) of whatever you want to recreate. I wanted to make prints that matched the Dwell Studios Space bedding set that we have so I took a picture of one of his receiving blankets in the set. Using a program like MS Paint, cut out the shapes you want and resize them to fit whatever design you're going to make. It doesn't matter if the pictures are a poor resolution - as long as you can see the shapes clearly, its all good. I print mine in black and white to save ink, but you can print them however you want.

Next, cut out the shapes, making them into pieces like this. Since the ship body, fins, tail, and window are all different colors, they need to be cut apart.


Then, trace the pieces of the design on scrapbook paper. A quick note about scrapbook paper - be creative! For this project, I wanted to recreate the rocket ship pattern exactly, so I bought solid colored paper that matched the blanket's design. In similar project, however, I made farm animals using prints like plaid, stripes, and paisley. A white cow with brown paisley spots and a pink polka dot udder, you say? I'll show pictures of that later. Back to the rocket ships.


Once you've got all of your pieces cut out, you can reassemble them and start making your design. I use a combination of glue stick and tape - whatever works! Ta-da! Rocket ship!


Once you've got the main pieces done, its time to get creative. You can take the general design and make it anything you want. This blue rocket ship was a basic part of the pattern, but I wanted to make it the main focus of this one print. Looking to another one of the blankets in the set, I recreated the striped pattern as a background for it. I used the white mat that was already part of the frame to glue everything to. No use letting it go to waste!


Then, put everything together and throw it in a frame! You're done!


These are the other ones I did for this set. The one with multiple little rocket ships was more time consuming than the others, but equally easy. Its all about tracing, cutting, and gluing.


Here are some other prints I did for Charlie's nursery when we were still team green and needed something a little more gender neutral. Same basic principle - I found farm animal images online and gave them the scrapbook paper treatment. The ducks might be my favorite. C'mon! Argyle water and polka dotted duck feet? Too cute.

If you have any questions about this project, please let me know! :-)

Five Months Old!

Okay, okay, so this is a few days late. Between Charlie and I being sick and a long weekend away, its been tough to update. Here's the scoop!

Mr. Charlie is getting big! At his last doctor's appointment he weighed in at 12lbs. 4oz. and was 25 inches long. I can't believe how big my little baby is getting! The bad news is that we were at the doctor because of a horrible wet cough he developed about a week ago. Four prescriptions and a week later, he's doing much better and back to his normal sleep schedule. He's still got a bit of a cough, but its significantly better than it was. We're not sure if he just had a virus or if he's got allergies, but we're playing it by ear.


 Other five month updates? Charlie's new obsessions are with his exersaucer and the stuffed piggy toy that we hang on his car seat and he's been sleeping muuuuch better than he has in the past. I don't want to temp the baby sleep gods, but I've definitely been enjoying the extra sleep!!


In other news, we have a tooth!! After one very long weekend of sleepless nights and one cranky baby, we have a tooth. As you can see in the picture, the second one isn't far behind. All I ask is that this second one doesn't hurt him so bad! It broke my heart to hear him cry in pain. :-( There's only so much Orajel can do when you've got a tooth cutting through your gum.