Image Map

Facebook Pinterest Twitter Instagram Email Family Home Crafty Recipes Goals Blog Roll PR
Showing posts with label Om Nom Nom. Show all posts

Tuesday, March 4, 2014

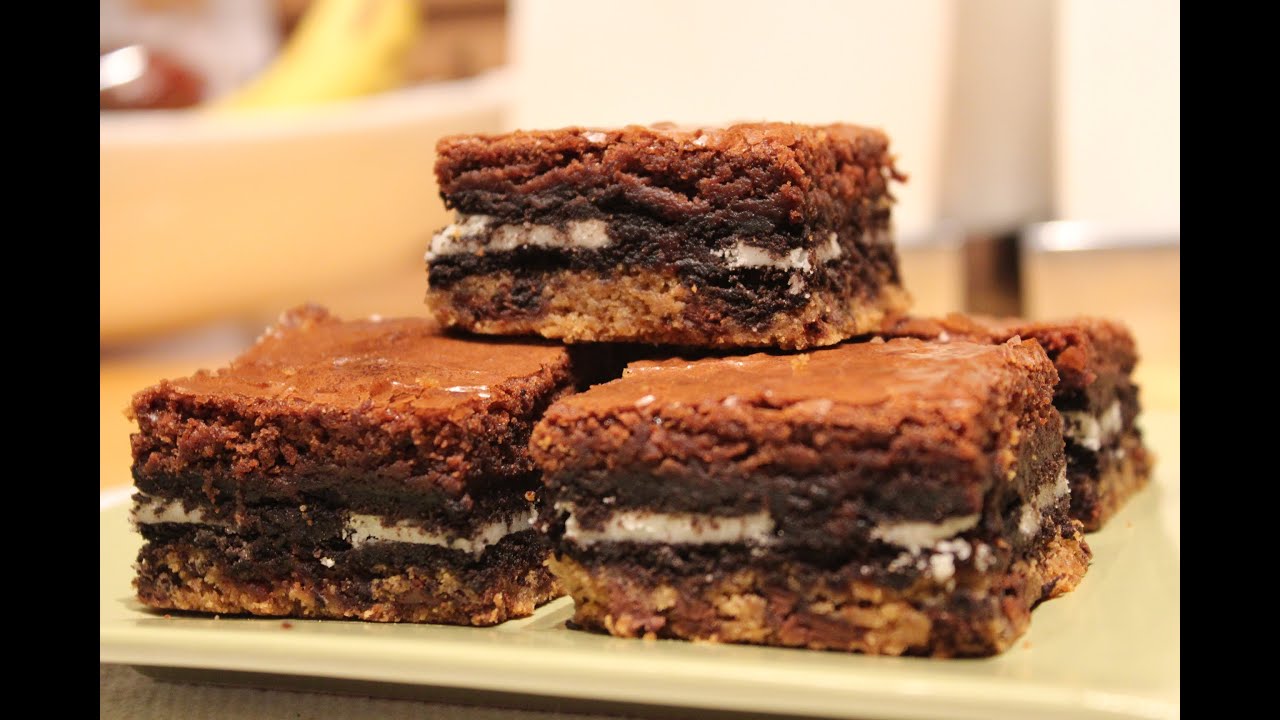
Double Cookie Brownies

These brownies are magical. No, not like that kind of magic brownie. Like, amazing OMG I'll have 5 more kind of magical. I've seen these on Pinterest here and there and finally tried them at a work function a few years ago. These might be my favorite guilty pleasure treat! They also go by the name "slutty brownies," but I'm not a fan of that word. Double Cookie Brownies, it is.

This really isn't a recipe as much as quick directions, which is nice when you need a dessert that looks more complicated than it actually is. Here's the break down...

Buy cookie dough, Oreo cookies, and brownie mix. Any flavor, style, type that you want. Chunky cookie dough, Double Stuft Oreos, and dark chocolate brownie mix? Cool. PB cookie dough, vanilla Oreos, and fudge brownie mix? Sure, why not. I was boring classic and went with chocolate chunk cookie dough, regular Oreos, and super fudgy brownie mix.

I used an 9 x 13 Pyrex dish for my brownies. Line your pan with aluminum foil and then spray it with non stick spray. Trust me, you'll appreciate this later.

Press your cookie dough into the bottom of the pan evenly. Then, top with Oreo cookies edge to edge across the whole pan. Then, prepare your brownie batter per the directions and pour all over the top.


I KNOW, RIGHT?! This should be illegal.

Bake at 350* for about 40 minutes. Test the middle for doneness if you're not sure. Let it cool for about 5-10 minutes (but not too long! Warm brownies are the best!) then pull the brownies out of the tray by the foil and lay on a cutting board.

Cut up and enjoy! Don't worry, I won't judge the size of your piece. ;-)


Wednesday, February 26, 2014

Monday, February 24, 2014

Zucchini Carrot Mini Muffins

Yesterday, I posted about trying to find more toddler-ish finger foods for Ginny. I got the idea to make up some mini veggie muffins using my Mom's zucchini bread recipe. This recipe has been around for as long as I can remember. We used to make loaves of bread as gifts for neighbors and friends around the holidays.

The original recipe was delicious, but not super healthy; it called for a lot of sugar and oil. Again, definitely delicious, but for this purpose I wanted to make it a little more kid friendly. Here's what I came up with and so far the kids love them! Charlie calls them "cupscakes." Veggie muffins instead of cupcakes? Sure kid!

Zucchini Carrot Mini Muffins

Ingredients

  • 1 1/2 c. flour
  • 1/2 c. sugar
  • 1 tsp. ground cinnamon
  • 1/2 tsp. baking soda
  • 1/4 tsp. salt
  • 1/4 tsp. baking powder
  • 1/4 tsp. nutmeg
  • 1 egg, beaten
  • 1/2 cup unpeeled zucchini, shredded
  • 1/2 cup peeled carrots, shredded
  • 1 cup unsweetened applesauce
  • 1/4 tsp. lemon zest

Directions

Prep a mini muffin pan. I used Pam baking spray, but you can use oil/Crisco and flour. Just get it good and stick resistant. Preheat oven to 350*.

In a large bowl, mix flour, sugar, cinnamon, baking soda, baking powder, and nutmeg. In another bowl, mix egg, zucchini, carrot, applesauce, and lemon peel. Add to dry mixture.


Put one heaping teaspoon full of batter in each mini muffin cup. Now, you're not supposed to eat batter and all that jazz, so I don't condone the consumption of raw egg and yadda yadda. If you DO happen to be a daring batter eater, I must warn you - this batter is freaking delicious.


Bake for 11-13 minutes. Try not to over bake or they become dry. One batch of batter makes about 2 dozen mini muffins.

The fun part about this recipe is that you can swap out the zucchini and carrot for apple or banana or you can swap out the applesauce for pumpkin puree. You can add cranberries, chocolate chips, or granola. Use your imagination!

I plan on sending these little muffins to daycare as a snack or part of lunch. Stick them in the freezer and pull them out the night before you need them!

Sunday, February 23, 2014

Toddler Finger Foods

In the ever expanding "Chronicles of the Second Child" we've completely forgotten how to (and that we had to) transition Ginny off a bottle and to more table food. Don't get me wrong, girl loves to eat, but she's still on several bottles a day, doesn't like a sippy cup, and still gets a bottle to bed. I know in the grand scheme of things, we're not "behind," but I feel like we had Charlie off bottles and purees and on mostly table food shortly after one. Whoops, sorry Gin.

Mmmmm pears...
Ginny gets a bottle and puree food for breakfast, three bottles and a little finger food at daycare, a bottle and finger food for dinner, and another bottle before bed. We need to start moving her to a real breakfast, morning snack, real lunch, afternoon snack, and dinner - with a sippy of milk throughout the day. This isn't going to happen over night, nor do I think it should.

First thing's first. Daycare would like us to send more "toddler" finger foods and snacks for Ginny to have throughout the day to start moving away from bottles of formula. Okay.

Wait. What the heck do I send?! And what's this about a "toddler?!" ::faints::

But really, Charlie was in this exact position a little over 2 years ago. How have I completely forgotten what snacks we fed him. Thank goodness for Pinterest and my Mom friends.

Dinner seems to be the easiest - we just cut up whatever we're eating. Breakfast and lunch/snacks at daycare seem to be a little harder.

This is what I've come up with for basic "toddler" foods...

Breakfast:
Eggs, toast strips, yogurt, oatmeal, diced up fruit, waffle sticks, dry cereal, pancakes (make ahead and freeze!), cottage cheese

Lunch:
PB & J sandwich, ravioli or tortellini, steamed veggies, hard boiled egg, shredded chicken or turkey, elbow pasta, sweet potato fries, sliced turkey or chicken lunch meat, cheese and crackers, diced up fruit, macaroni and cheese, rice, couscous (though its a huge mess), general dinner left overs

Snacks:
Rice cakes, crackers, Cheerios, diced up fruit, cheese cubes or slices, mini muffins, cottage cheese and fruit, red pepper strips, applesauce


Then there is the Pinterest board I put together on feeding toddlers. That should help too.

Follow Jen's board Feeding Kids on Pinterest.


Now the trick to all of this is actually putting together fancy, fun, bento style meals that look like something off a Pinterest board. Yeah, that's probably not going to happen. This is one of those times that I feel like I'm failing my kids because I work so much.

I need to invest in new lunch box stuff for Ginny now that she'll be getting more than bottles and one little cup of food to daycare. She has a cute Sugar Booger lunch box, so that's a start. I'm on the hunt for a nice, quality bento box style lunch kit.

Anyone out there have a favorite?

Sunday, December 8, 2013

Soup Weather

I love the winter. That's right people, I love it. The snow, wind, freezing temperatures - I love it! I know its technically still fall until later this month, but you know what I mean. Between Christmas, snow, sledding, and hot cocoa - what's not to like? One of my favorite parts is soup. Sure, you can make soup year round, but there is something special about coming home to a warm house and a crock pot full of delicious home cookin'. With snow falling as I was meal planning this morning, it put me in the soupy mood.

Here are my favorite soup recipes for the cold weather! Some links are mine and others are from other blogs and recipe sites.

Cheesy Chicken Corn Chowder

Loaded Baked Potato Soup

Slippery Pot Pie

White Chicken Chili

Cheesy Veggie Chowder

Spicy Black Bean Soup

Lentil Soup

Roasted Red Pepper Potato Soup

Classic French Onion Soup

Roasted Tomato Basil Soup

Slow Cooker Taco Soup

Beef Barley Soup

Creamy Tomato Tortellini Soup

Home Style Chicken Noodle

Slow Cooker Minestrone


Do you have a favorite soup/chowder recipe? Link it in the comments!

Saturday, April 13, 2013

We need more space!

In the freezer, that is.

As I was feeding G earlier today I realized something - once I go back to work and start freezing breast milk we will be seriously short on freezer space. Then I further realized that once we start making and freezing baby food, well, there won't be any room at all! Time to start scouring Craig's List for a chest freezer. I wasn't sure if J would be on board with getting a semi-big appliance for what would realistically only be a year of milk and puree foods, he loved the idea! "We can always use more freezer space." he said. Done and done.

With gardening season rapidly approaching, I'm excited to start making and freezing baby food. By the time G is six months and ready to start solids, we should have a nice stash of purees for her to try thanks to our garden and local you pick places. Using this guide from Wholesome Baby Food's website, it'll be easy to decide what to freeze and for how long. 

If you want to make your own baby food, definitely check out Wholesome Baby Food. Its a great website with puree and baby led weaning info, recipes for different stages, and just about anything you want to know about feeding your baby.

Still working on breastfeeding? My favorite resource for that is KellyMom.com. There are so many questions and worries when you're breastfeeding and I can honestly say this site has answered every single one of mine - including information about pumping, storing, and using milk. With a deep freezer, I can store breast milk for up to a year. How's that for awesome?

Hopefully, Craig's List doesn't let me down. It is usually slim pickins in this area, but you never know. Wish me luck!

Wednesday, March 6, 2013

52 Recipe Challenge: Slippery Pot Pie

While I've fallen behind on posting about it, no worries, we're still keeping up with the 52 Week Recipe Challenge! This week (#9), we're trying out a recipe for Slippery Pot Pie.

What is Slippery Pot Pie, you ask? A delicious Pennsylvania Dutch take on the classic pot pie, but without the flaky crust on top. Instead, there are thick squares of soft egg noodles floating around the hearty stew of chicken (or turkey, beef, ham) and veggies. SO delicious!

My kitchen helper
There wasn't actually one central recipe for this one. I read over lots of recipes and made up my own for fun. Its a cold, snowy week here and this was the perfect remedy.

This recipe has the potential to take two to three days (roasting the chicken, making the stock, then making the soup), but you can always use precooked chicken and/or boxed stock. You can also purchase the pot pie noodles in a bag to make this recipe even faster, but I'll warn you - its just not the same!


Slippery Pot Pie

Chicken & Stock Directions
  • Cooking the Chicken: Cook roaster chicken in a crock pot on low for 8 hours. We add veggies underneath for flavor, but no water or other liquid. You want all the good chicken juices to come out. 
  • Making the Stock: Pick the chicken, chop meat into small pieces, and put in the fridge for later. Put all of the bones, skin, and fat back into the crock pot full of chicken juices and add six cups of water. Cook on low for 8 hours or overnight. In the morning strain the stock and put in the fridge. After it cools, you can scoop off the fat solids if you want a lower fat stock.

Pasta Dough Ingredients

1 1/2 cup flour
1 egg
3 tbs cold water (more or less to form the dough)
1/2 tsp salt

Directions

Mix flour, salt, and egg. Add water. Knead to form ball, then cover and allow to rest for 15 minutes. Roll out thinly and cut into 1 - 2 inch squares.


Filling Ingredients

Cooked, chopped chicken from one roaster (about 1 pound)
8 cups chicken stock
1 cup celery, diced
1/2 cup onions, raw chopped
3/4 cup carrots, chopped
1 cup potato, peeled and diced
1 can Cream of Chicken soup
Pot pie noodles
1tsp salt

1tsp black pepper

Directions
  • Simmer stock, chicken, vegetables, and salt/pepper for about an hour and a half.
  • Bring to soft rolling boil, stir in cream of chicken soup. 
  • Add pot pie noodles one or two at a time so they don't stick together. Stir frequently. Cook for an additional 10-12 minutes.
Yields approximately 6 hearty 2 cup servings.


Yes, this soup can be time consuming, but its incredibly worth it. Freeze extras or double/triple the recipe to feed a small army. With bone-in chicken being inexpensive and the stock being essentially free bonus, you can make this cozy eats-like-a-meal soup for approximately $8 a pot ($1.33 per 2 cup serving). Enjoy!


Wednesday, October 17, 2012

Wordless Wednesday: New Favorite Snack

If you don't watch him, he'll eat the entire thing - core and all. Thank goodness for this handy kitchen tool: OXO Good Grips Corer. Pop out the core and he can eat the whole darn apple if he wants...and usually does. 


Tuesday, January 24, 2012

Toddle Along Tuesday: Must Have Item

Course #1. No, I'm not kidding.
This week, I'm linking up with Growing Up Geeky for Toddle Along Tuesday! This week's topic is your current must have baby/toddler item.

For us, I can say that it's hands down our food scissors. Yes, I said food scissors. Like, plain old stuck in your knife block scissors made to cut food. With a bottomless pit for a toddler, a knife and fork just don't cut it (see what I did there?) and the scissors make it faster and easier to prep food for the beast.

They work so well, we actually bought a second set for the diaper bag. They even came with a sheath, making them all travel savvy. Sure, people give us funny looks in restaurants, but I can cut a slice of pizza into toddler sized pieces in literally a minute. Just make long cuts up the slice without going through the crust, then cuts straight across to make the desired sized pieces. Take that fork and knife.


While its not your typical baby item, it's definitely a keeper.

Have a favorite baby item you want to rave about? Just want to read a really funny/informative/geeky Mom blog? Check out Growing Up Geeky & Toddle Along Tuesday!


Saturday, December 17, 2011

Operation: No More Bottles

You heard me right. C's New Year's resolution is to kick the bottle habit. I realized that C was only taking a bottle in the morning and at night with sippy cups in between, so why couldn't he just get a sippy all the time? He isn't particularly attached to his bottle and doesn't give a hoot whether we hand him a spout sippy, straw sippy, bottle, etc. Lets take advantage of this before he starts asking for a "baba" by name, shall we?

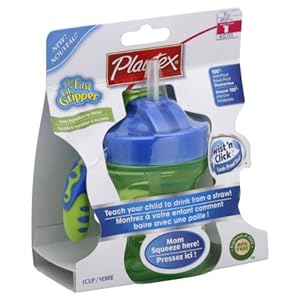
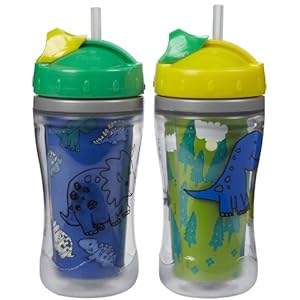
We originally had the Playtex First Little Gripper straw cup. You squeeze the bottom to teach your child that liquid comes up from the straw when they suck. It worked well to teach the concept, but we realized that in order to make it an easy straw and spill proof, there isn't a pressure release hole in the top of the cap. That means that after a suck or two, he has to release the suck to allow air back in. This made an absolute mess since he usually had water in his mouth when he did so. Again, great starter cup, but just not that great for a bigger kid trying to chug their cup.

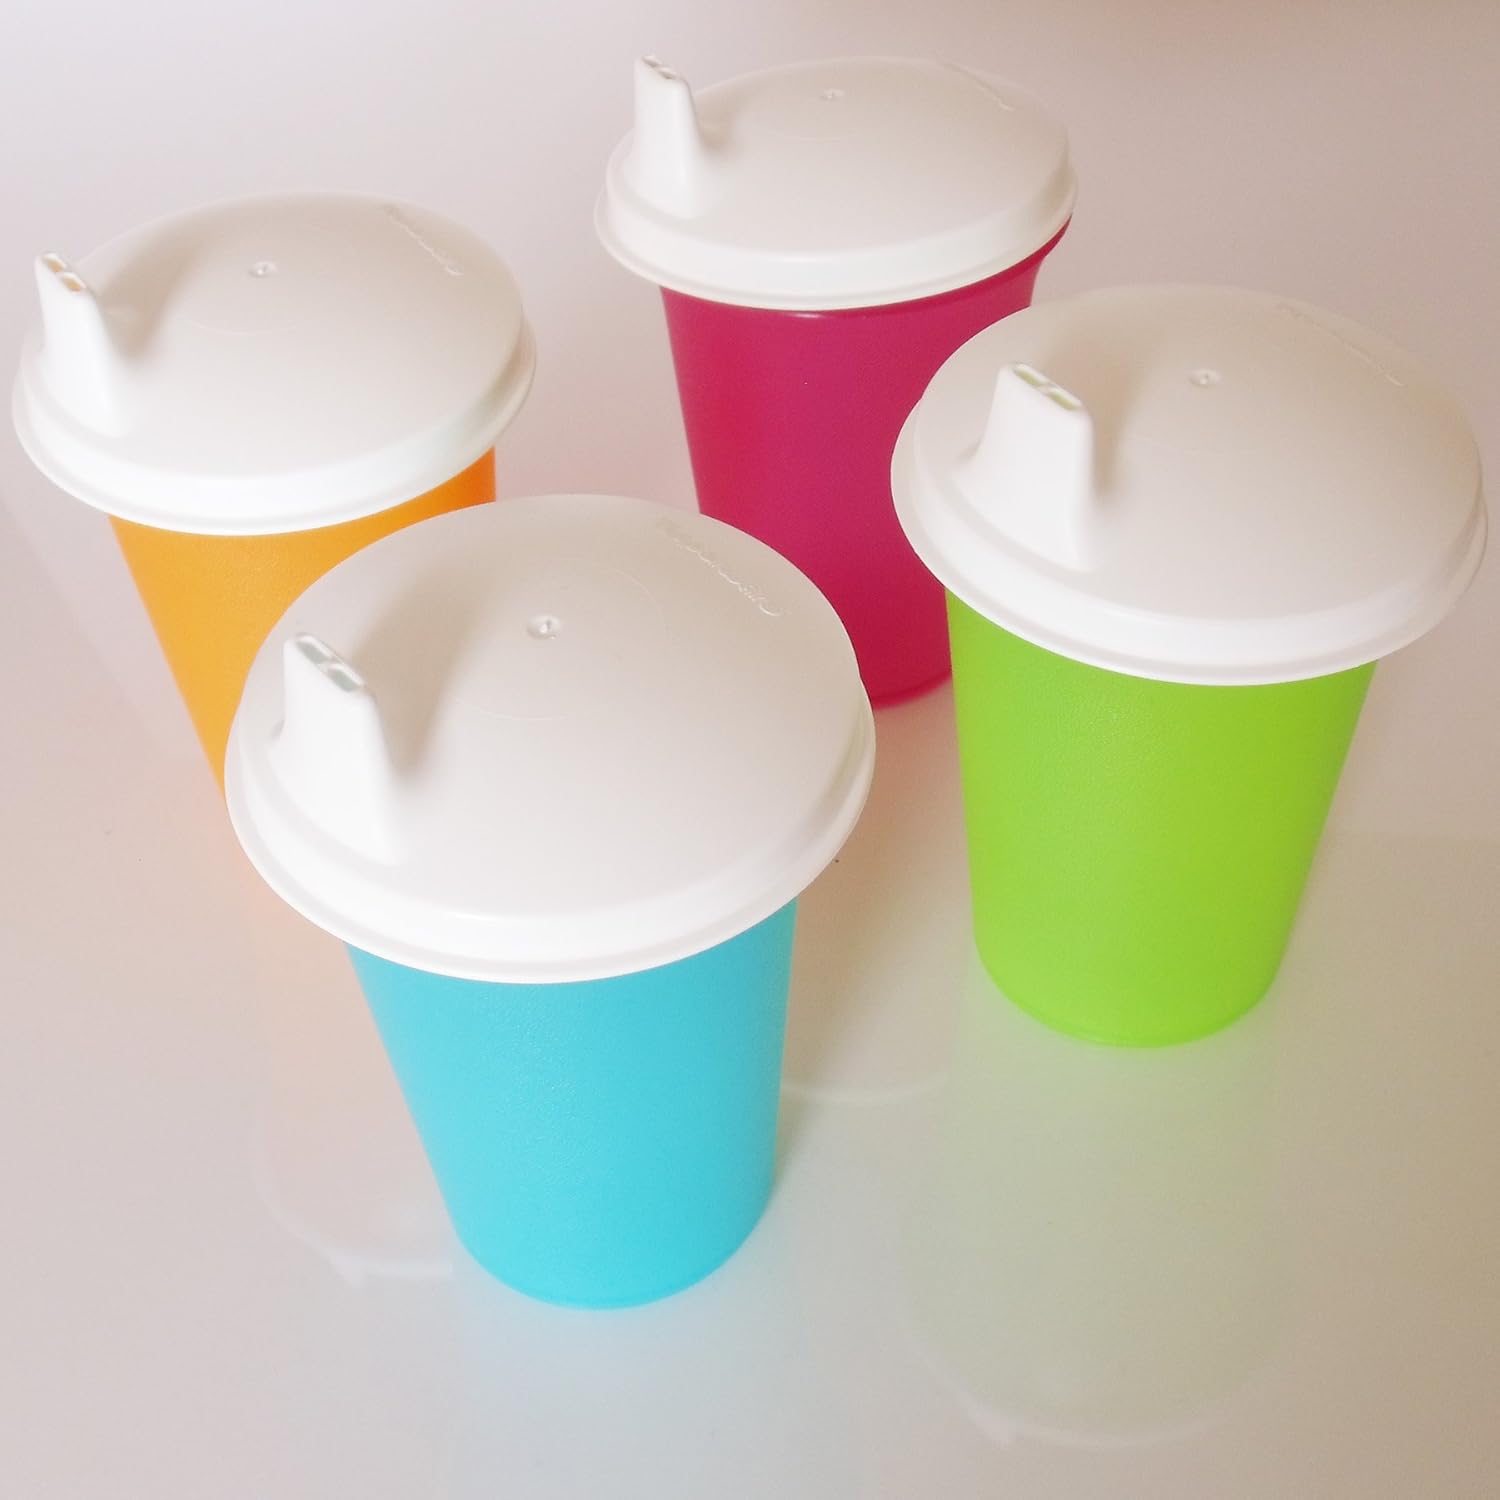
For a while there, we switched to a regular old fashioned Tupperware bell tumbler. The pros were that it was easy for him to drink out of and easy for him to hold. The cons were that it wasn't spill proof what so ever and he had a hard time understanding the "tip it back to get liquid" concept.

Yesterday, we ate dinner with friends of ours and I noticed their two year old had a different kind of Playtex straw cup. It was a big kid insulated version that was spill proof and had a pressure release hole. Basically - exactly what we were looking for. They let us try one out during dinner and despite his very stuffy nose, C was able to do really well drinking out of it! Once his nose clears out and he can drink continuously without having to stop and breathe, I really think he'll be set.

We ran out to Target today and picked up a set of our own (they're called Playtex Insulated Twist n Click Straw Cup). To my delight, there were actually several options of boy prints to choose from (Moms of boys know what I'm talking about) AND Target had a coupon for $2 off! They came to about $6 for two cups and we love them already. They really are spill proof, they are easy to hold, and most important - easy to clean. There is a slider on the top that closes off the straw for storage and it seems to be pretty darn leak proof. C has already subjected it to the incredibly scientific "throwing around the living room" test.

So, wish us luck. We replaced bottle #1 with a sippy tonight and he happily chugged away. Lets see how he does tomorrow with his breakfast sippy. Here's to an easy transition.


As a final note, if you are going to venture into the straw sippy cup world, do yourself a favor and buy one of these - a sippy cup straw brush. You'll thank me. :-)

Monday, September 19, 2011

The Bottomless Pit


Vintage Charlie during a bottle/sleep battle
Its hard to believe that 10 short months ago, we were struggling and fighting with Charlie to take 20 - 30 mL at a single feeding. Day after day, trying to get him to stay awake long enough to down the tiniest amount of milk.

Look at how orange that poor child was! Jaundice wasn't a good look for him.

Now? Getting him to eat is the least of my worries. He's my little bottomless pit. It makes me all teary eyed to think of all he's gone through with his weight and eating to see him thriving and eating like a champ.

We haven't gotten an official weight since his appointment a few weeks ago, but he's got to be at least 19 lbs. now and though his skinny butt is still in 3-6 months pants, he's sporting 12 months sized onesies and pajamas.

While it doesn't make me feel super great, C's weight gain and obsession with eating definitely coincided with the move from breast milk to solid food. Granted, I'd probably prefer a cheeseburger to breast milk too....again, doesn't make me feel super great as a Mom. C'est la vie. He's doing well; I got over it.

Mmmmm spaghetti and meatballs
Though we started at 6 months with completely pureed foods, we began introducing more solid options around 7 months. Mum Mums and puffs were first, followed by fruit in a mesh feeder which, come to think of it, sounds like something for feeding animals, not children.
 
I quickly realized two things about introducing solid foods. 1) It was SCARY as hell. 2) He was going to cough and gag as he learned to move food around his mouth and I could not jump to "save" him at every single little noise. Okay, so maybe my sister helped me realize that second one. She successfully survived this with my nephew and now he eats hamburgers with six teeth.

Once this grand realization came around, we started giving him bits and chunks of just about everything. Waffles, spaghetti and meatballs, cheese, shredded chicken, rice, veggies, pizza, mac and cheese....you name it. The key? Food scissors. I have a pair in the kitchen and a pair in the diaper bag and you bet your bonnet I whip those puppies out in a restaurant to cut up his food. And for those who knew her - yes, I realize that I am becoming my mother.

It makes preparing food so much faster and easier. The more varied food he eats, the better he gets. Tonight, we went out for pizza and he ate two small slices himself without as much as a single cough. I was floored. Where did my tiny baby go?

One important part of feeding solid foods confidently is knowing what to do if something goes wrong. It will happen at some point - something will get shoved by the handful and get stuck. What do you do? If you have a little one and are not trained in infant CPR, get trained. It could save your child's life. C has definitely had close calls over the months, but nothing a quick, calm reaction (read: swift smack on the back) didn't correct. Here is a free printable infant CPR guide. Print it and hang it near where your child eats. While it is not a substitute for proper training, it can't hurt.

All of the potentially scary stuff aside, introducing solid foods has been such a great experience. Seeing C try and love new foods is a lot of fun and trying out new recipes has made dinner interesting again. Gone are the days of a quick, clean bottle as a meal, however. Dinner regularly results in a bath, laundry, and vacuuming the dining room. Its just part of the fun.

Friday, May 20, 2011

Yum! Real food!

A few weeks ago, we started Charlie on solid food as a supplement to breast milk and I couldn't ask for it to be going any better. We're really hoping it helps him pack on some weight since he's still quite the peanut at only 12.5 lbs. He has another weight check on June 2nd, so hopefully solids have made a difference.

As with everything baby related, I did a lot of reading up on introducing solids, what, how much and when and as with everything baby related, found incredibly conflicting views on what babies *should* eat. I saw everything from starting cereal at 3 months to nothing until 6 months to give them whatever they want, whenever they want. Enough craziness to confuse the crap out of you. Because of Charlie's preemie-ness, we waited until 5 1/2 months to start and began with something simple - oatmeal. I decided to skip rice cereal all together because its pretty darn gross and has little to no nutritional value. Even as a practice food, oatmeal just had more oomph to it. Shortly after, we started him on sweet potatoes, which he loved. Every few days, we incorporated a new taste for him to try. At this point, he's up to sweet potatoes, peas, carrots, squash, bananas, apples, pears, and mango. His favorite is still the sweet potatoes with mango being a close second.

Once we established what he liked, I was pretty much done buying prepackaged baby food. C'mon...$1 for 4 ounces of food in a non-recyclable plastic tub? And that's the sale price! Instead we broke out our handy dandy baby food making supplies and made our own. Yes, apparently my iPod is a baby food making supply. As for a food processor, we have the Kid Co. baby food processor, but any food processor or really even a fork will do.

With $6 in veggies and fruits from Kroger and the farmer's market, I made 2 weeks worth of organic baby food. Can't beat it! At this stage of the game, the "recipe" for baby food is pretty simple. Steam/boil/bake veggies and fruits, then mash. As baby gets older though, there are some really great recipes to help them develop a non-picky palate. Of all the websites I found, I really loved Wholesome Baby Foods. Its no nonsense, nonjudgmental approach to feeding your kid was very appealing. If you haven't noticed, finding anything parenting related that is not judgmental is nearly impossible, so this was quite a find.

Once the fruits and veggies are cooked and mashed, I put the puree into ice cube trays to freeze.

We bought these ice cube trays by Oxo that are rounded on the bottom. No twisting and cracking needed - just poke one side of the cube and it pops out. Once the food cubes were set, I put them into zip top bags, labeled them, and put them in the freezer. Between the 150 oz. of breast milk and now frozen baby food, Charlie is quickly taking over our small freezer.

Each day, Charlie gets 1/4 cup of oatmeal and two fruit cubes for breakfast and two veggies cubes and two fruit cubes for dinner. We put the cubes into these little bowls the night before and put them in the fridge. Since they have a two wells and a good lid, they're perfect for defrosting and serving. So far its been a pretty smooth system. Since its best for breast milk to continue to be his main source of nutrition, we only feed him solids after breast feeding. Regardless of all the boobie juice, however, he still happily wolfs down whatever we give him.

Once the summer comes, I'm absolutely psyched to throw Charlie in the Beco and visit the local pick your own farms. Doesn't get anymore hippie than that. ;-)